Hope you enjoy making this PUNCH ART card - Thank you to all the girls that have order this kit
so lets get started. If you have a kit you can see I have punch out the shapes but you need to trim them into shape.
 |
| So here are all the shape you need to cut |
 |
| To start you need to trim your Strawberry Slush 1-3/4 x 7/8 Large oval shape. Then snail to the small oval 3/4x15/16 punch shape |
 |
| Using the 3/4' circle punch shape in Basic black and trim as in photo above to make hair. Use the Blushing Bride 3/4 circle punch shape for the face. Snail hair to face |
 |
| Snail hat to the head |
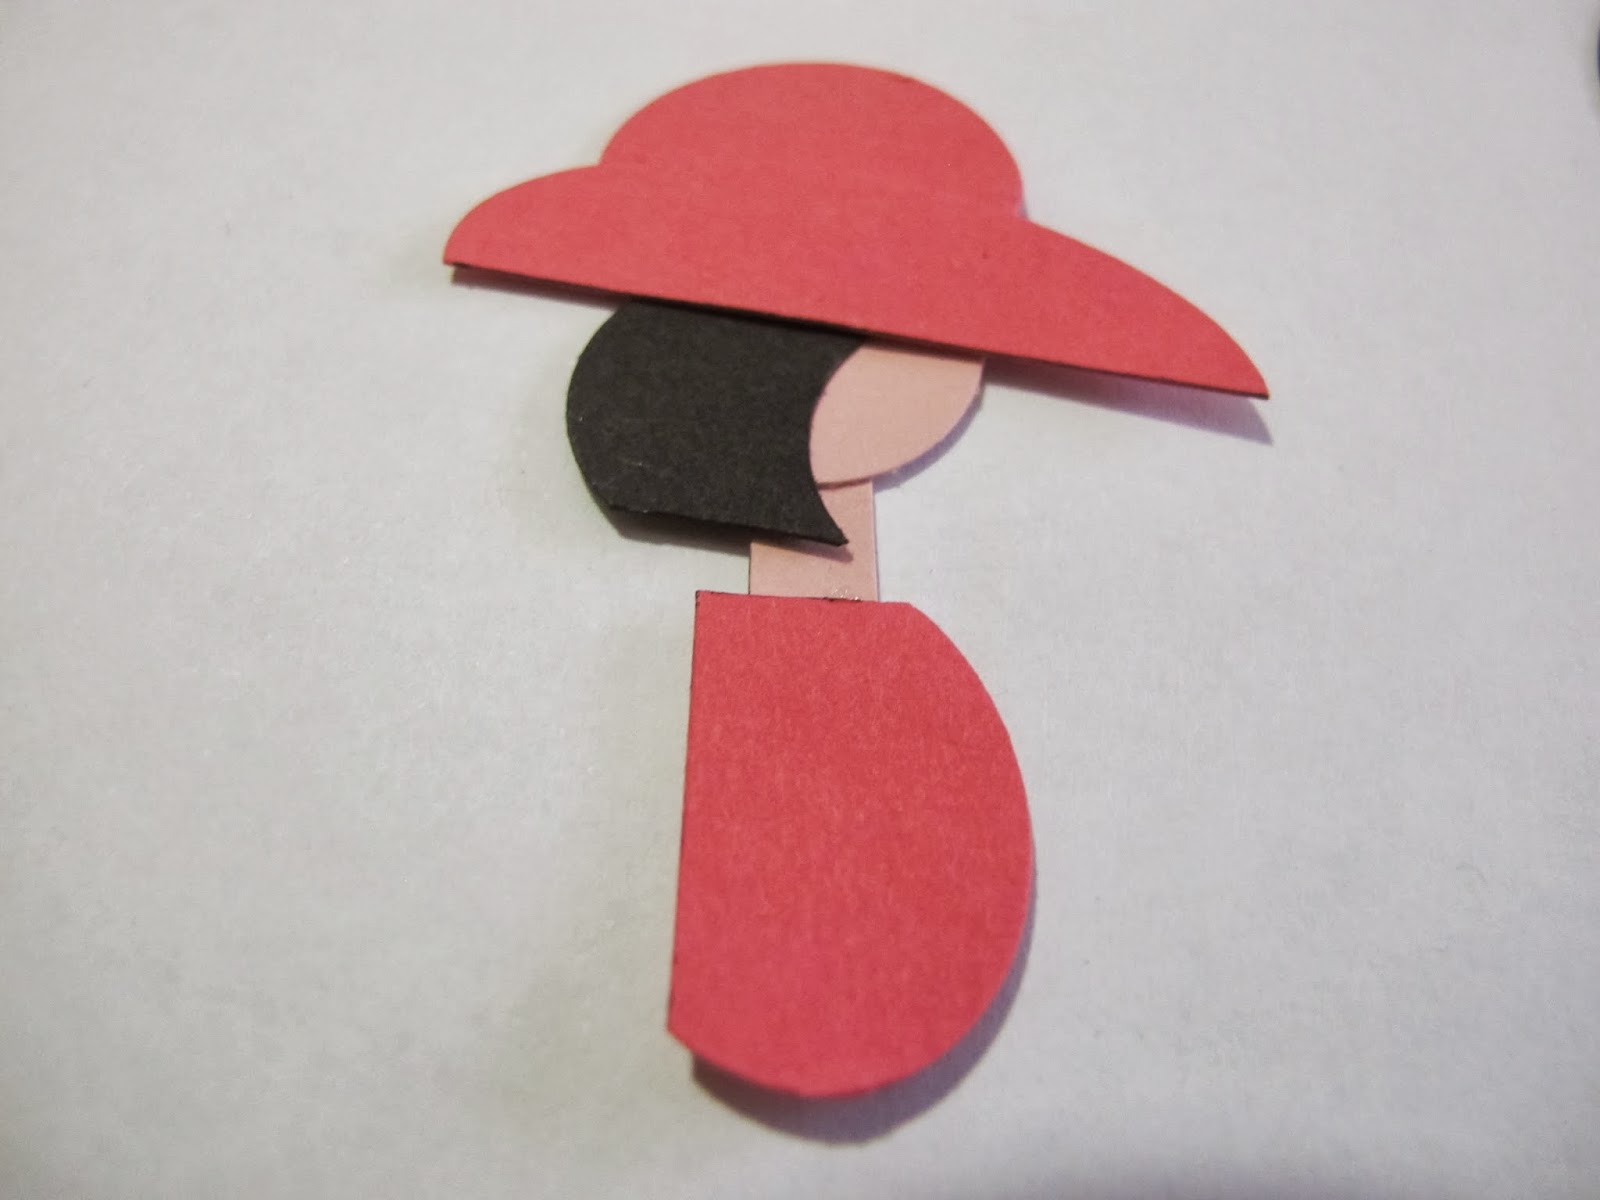 |
| Add your neck which is the small Ticket Duo Builder in Blushing Bride card. Using the small Oval punch cut as in photo above then snail to neck. |
 |
| To get our belly use the Big shot Circles Collection Framelits 6cm across and cut as in photo above then snail to top of Dress |
 |
| using basic Black card and the Modern Label trim up both sides to make pants then snail to the back of dress. You will also have a 7cm x 14 cm Coastal Cabana Card and I have used the Decorative Dots Embossing Folder this is done if you have a kit but if not you can use any embossing folder you have. |
 |
| you will have two 1 3/4" Circle one in Basic Black cut to shape and one in Strawberry Slush cut to shape to make top of bag. Using the Large oval Punch trim to make handle |
 |
| If you like to stamp on dress and hat I have used the dots out of the Happy Watercolor Stamp set out of the Occasion Catalogue |

 |
| Using the large oval in Blushing Bride card and cut to shape for the arm and snail at back of dress . Then add your bag as in the photo above |
 |
| Add a Stampin Dimensionals on dress to hold bag down as in photo above |
 |
| Shoes I have used the Secret Garden Framelits shape the shoes |
 |
| You will need to cut your two shoes as above draw the shape you wont then cut. Add shoe to ankles with is the other Ticket Duo cut in half and snail to pants and shoes see the forth photo down |
 |
| Cut you Basic Black card 14.5cm x 21cm fold in half using a Bone folder Then add Sweet Sorbet Designer Series Paper from SAB If you don't have this you still have time to purchase a $90 order or a $180 and you can get both the Sweet Sorbet DSP and the Decorative Dots you have until 31 March 2014 |
 |
| I also have used the Just Sayin' Stamp set and the Word Bubbles Framelits Die from the Occasion Catalogue Also used our ink markers Strawberry Sluch and Coastal Cabana Then use the Big shot and the Magnetic platform to hold the framelits in place as in the photo above, |
 |
| Stamp out and run through big shot |
 |
| This is the back side of our lady. know add Dimensionals to the back so she will stand out from the card. |
 |
| Turn over make sure you can not see and Dimensionals |
 |
| Snail your DSP to your card then add the embossed Coastal Cabana strip then add your lady and your words |
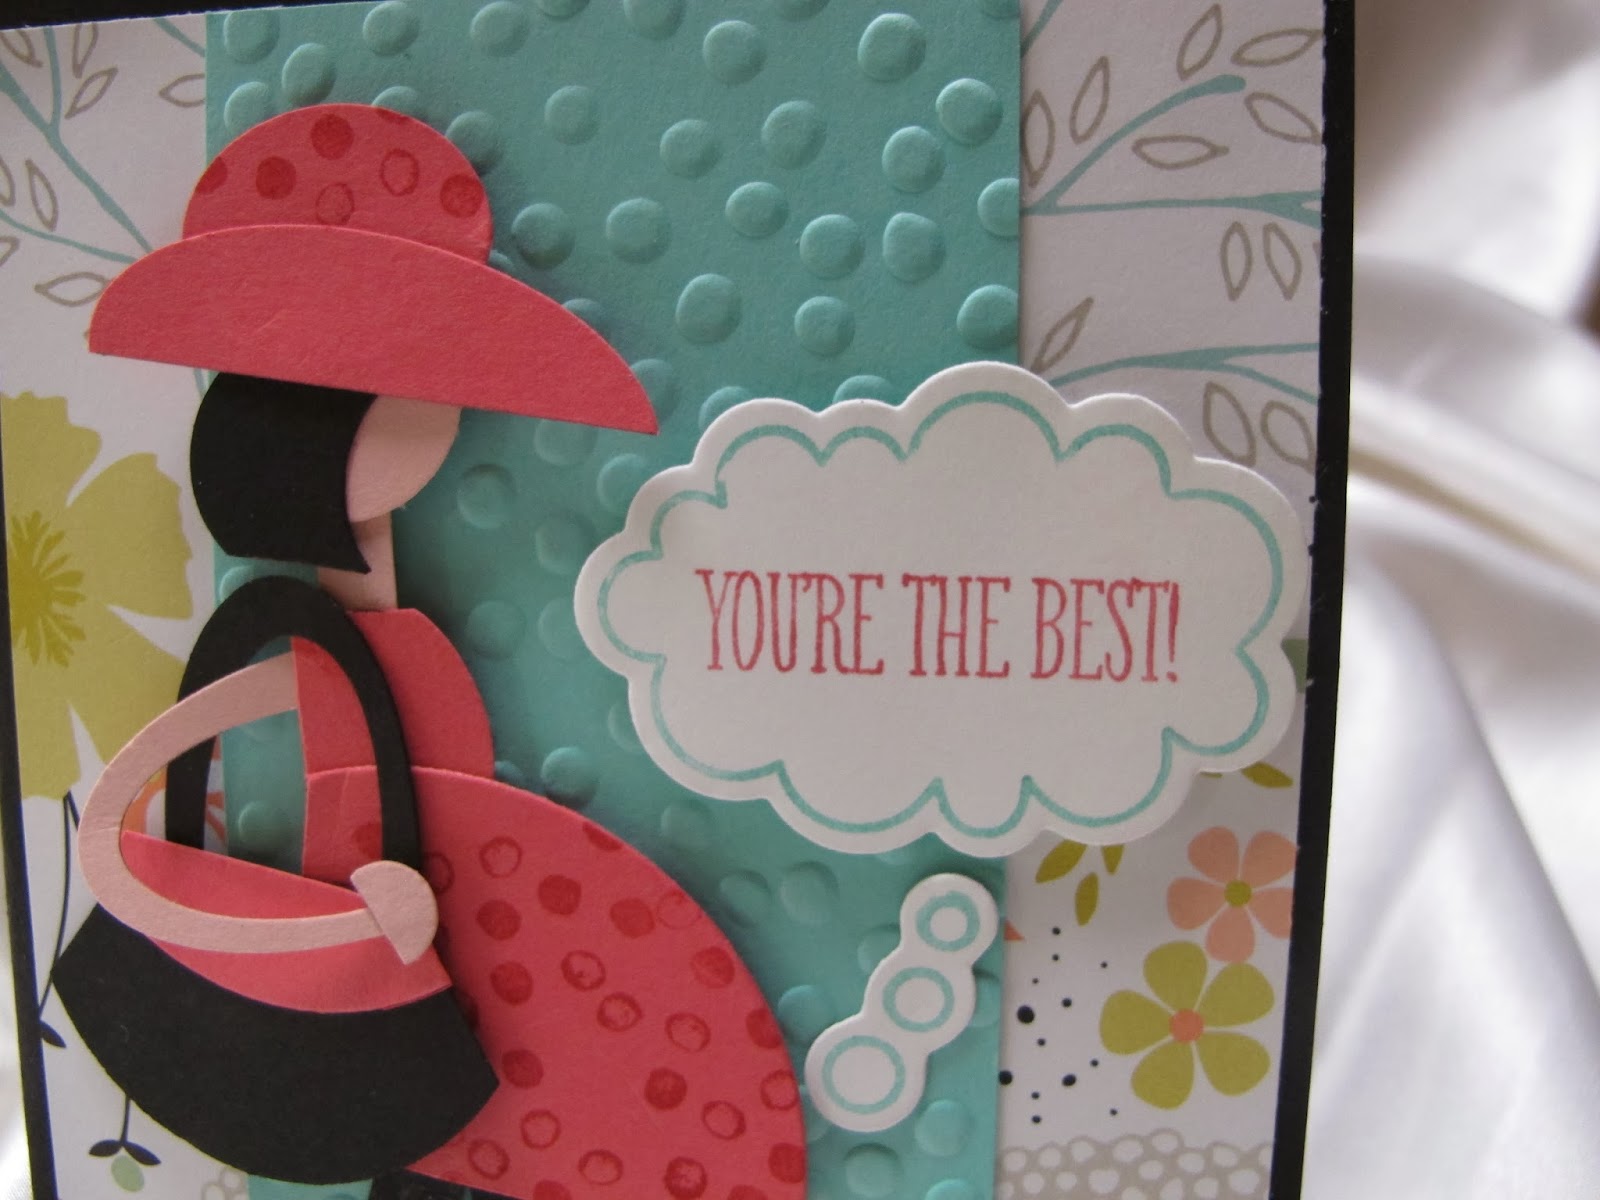 |
| Bit more of a close up for you I really hope you enjoy making Mama to be So what I used to make this card Stamp set:- Happy Watercolor Shop Here wood or Here Clear Just Sayin Shop Here Wood or Here Clear
Card Stock: Strawberry Slush
Basic Black
Coastal Cabana
Whisper white
DSP: Sweet Sorbet Free SAB with each $90 Purchase!
Inks: Markers
Strawberry Slush
Coastal Cabana
Punch:-
Large Oval
Small Oval
Modern Label
Ticket Duo Builder
Owl Builder
1-3/4 Circle
3/4 circle
Big Shot:
Circles Collection Framelits
Secret Garden Framelits
Word Bubbles Framelits
Embossing Folder:
Decorative Dots SAB Free with each $90 Purchase! AU only
|
 |
| SAB ends 31 March 2014 |
No comments:
Post a Comment