Merry Christmas and Happy New year.
Hi everyone 2 days to Christmas We are all getting ready to spend some special time with family. I am really looking forward to having my girls with me and there family's doing the hole Christmas lunch.Hope Santa is kind to you all will see you back here after Christmas.
Teresa
Monday, December 22, 2008
Wednesday, December 17, 2008

Monday, December 8, 2008
January Class 3 D cards for him
I just love this For Father Stamp Set in the Summer Mini.
Step 1 Use your embossing buddy first then used the Versa Mark on the stamp.
Stamp this out 3 times don't forget to use Versa Mark each time on watercolour Paper.
this is for your first card
 Step 2 Using Black embossing powder over your stamp image
 Step 3 Clean up Powder Pal put black powder back into jar

Step 4 Using your heat tool emboss image.

Step 5 should have 3 image like in photo below
 Step 6 Using your Aqua Painter and Watercolour Wonder Crayons fill in all image es
 Step 7 Should look like photo below
 Step 8 Vesa Mark next stamp this is for your second card
 Step 9 Use embossing Buddy
 Step 10 Stamp onto Water Colour Paper

Step 11 use black embossing powder
 Step 12 use heat tool

Step 13 Use Aqua Painter and water Color Crayons Step 14 should look like photo below
 Step 15 cut out around image
Step 16 cut out next image
 Step 17 Cut your card to 27cm x 10cm and fold in half Using the crimp er
Step 1 Use your embossing buddy first then used the Versa Mark on the stamp.
Stamp this out 3 times don't forget to use Versa Mark each time on watercolour Paper.
this is for your first card
 Step 2 Using Black embossing powder over your stamp image
 Step 3 Clean up Powder Pal put black powder back into jar
Step 4 Using your heat tool emboss image.

Step 5 should have 3 image like in photo below
 Step 6 Using your Aqua Painter and Watercolour Wonder Crayons fill in all image es
 Step 7 Should look like photo below
 Step 8 Vesa Mark next stamp this is for your second card
 Step 9 Use embossing Buddy
 Step 10 Stamp onto Water Colour Paper
Step 11 use black embossing powder
 Step 12 use heat tool
Step 13 Use Aqua Painter and water Color Crayons
 Step 14 should look like photo below
 Step 15 cut out around image
Step 16 cut out next image
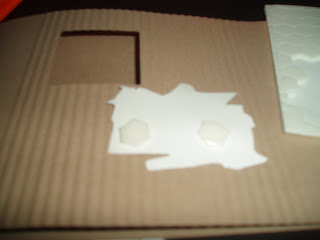
Step 17 Cut your card to 27cm x 10cm and fold in half Using the crimp er crimp up to the fold line  Step 18 using the 1-3/8 Square punch.
 Step 18 using the 1-3/8 Square punch.
Punch out a window
Step 19 should look like photo below.

Step 19 should look like photo below.
Using Stampin' Dimensional on the back of the 2nd image like in the photo below.
Step 20 using Stampin' spots
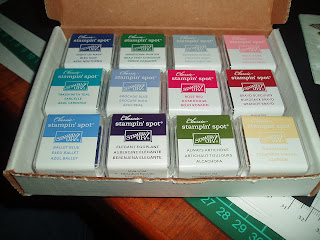
Step 21 Pick out the color you wont to use and run the stampin' spot over the crimp side of the card as you can see in the photo below.
 Step 22 Place your first image down of your 3 D as you can see in the photo below
 Step 23 Place your second image down over the top of your first image
  as you can see in the photo below I have just done the front boot and dog

Step 24 add your third image and as you can see this time I have just done the head
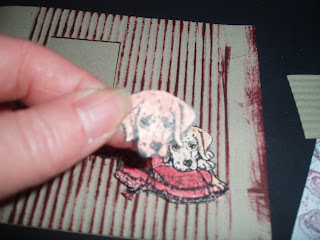
now your card should look like the photo below
 Step 25 Using Ribbon Original Thater
 Step 26 using the for you out of the stamp set Say It with Scallops and then crimp
 looks like photo below
 Step27 using your black marker run over the words
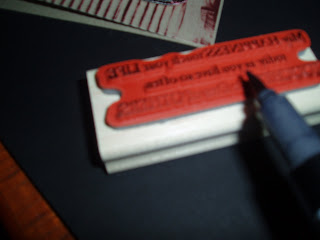
will look like the photo below
 Using the Ribbon from Theater I have gone with the brown and tied around the side as show en in the photo below now my card is finished . Book into January class and have fun and you two can make this.Ring me today don't miss out filling fast.
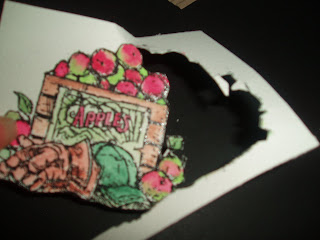
 Second Card cut around your image as you can see in photo below
Using some Hodgepodge Hardware
 pick out your word stamp then you can use a hodgepodge piece as you can see I have in the photo below I have also used the paper-piercing tool so I can insert the brads
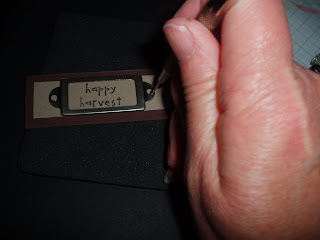
inserted brads

open them up at the back using you paper-piercing tool
 Cut some card and place Stampin' Dimensional to the back as you can see I have done in the photo below
 Know your card should look like this in the photo below

This time I have used a marker to go over the crimp as in the photo below

Step 20 using Stampin' spots

Step 21 Pick out the color you wont to use and run the stampin' spot over the crimp side of the card
 as you can see in the photo below.Step 22 Place your first image down of your 3 D as you can see in the photo below
 Step 23 Place your second image down over the top of your first image
  as you can see in the photo below I have just done the front boot and dog
Step 24 add your third image and as you can see this time I have just done the head

now your card should look like the photo below
 Step 25 Using Ribbon Original Thater
 Step 26 using the for you out of the stamp set Say It with Scallops and then crimp
 looks like photo below
 Step27 using your black marker run over the words
will look like the photo below
 Using the Ribbon from Theater I have gone with the brown and tied around the side as show en in the photo below now my card is finished . Book into January class and have fun and you two can make this.Ring me today don't miss out filling fast.
 Second Card cut around your image as you can see in photo below
Using some Hodgepodge Hardware
 pick out your word stamp then you can use a hodgepodge piece as you can see I have in the photo below I have also used the paper-piercing tool so I can insert the brads
inserted brads

open them up at the back using you paper-piercing tool
 Cut some card and place Stampin' Dimensional to the back as you can see I have done in the photo below
 Know your card should look like this in the photo below
This time I have used a marker to go over the crimp as in the photo below


Tuesday, December 2, 2008
Hostess Thank you For Summer Mini
Hi to all you wonderful Demonstrator looking for a great little Thank you for your Hostesses
Try this Wish List Card using everything from the Summer Mini Catalogue 2008-2009
I have use this double-side Designer Series Paper Afternoon Tea Step 1 cut a strip of Designer Series Paper 7.5cm wide then fold the bottom up 11cm then fold the top down 5.5cm
 Step 2 Fold the top piece back 1.5cm as you can see in photo below use your grid paper to help get the right measurement and a ruler

Step 3 cut a Stampin Up my wish list up the side of page and the price and just below to place order,please call: you have room to put your phone number as you can see on the photo below.
 Step 4 fold up
 and place just under the top as you can see by the photo below

 Step 7 Using Stampin Dimensional on the back of the small flower as you can see in the photo below
 you only need one flower from the stamp
 This holds the top in place

Step 8 Using the 3/16" Corner Rounder as you can see in the Photo below
 Step 9 Cut a strip of you D.S.P 30cm long and the width you would like for you paper Ribbon
Try this Wish List Card using everything from the Summer Mini Catalogue 2008-2009
I have use this double-side Designer Series Paper Afternoon Tea
 Step 1 cut a strip of Designer Series Paper 7.5cm wide then fold the bottom up 11cm then fold the top down 5.5cm
 Step 2 Fold the top piece back 1.5cm as you can see in photo below use your grid paper to help get the right measurement and a ruler
Step 3 cut a Stampin Up my wish list up the side of page and the price and just below to place order,please call: you have room to put your phone number as you can see on the photo below.
 Step 4 fold up
 and place just under the top as you can see by the photo below
Step 5 Using the stamp set Eastern Blooms stamp out the big flower in Groovy Guava and the small one in Bordering Blue then cut the flowers out
Step 6 Using a stapler. Staple the big flower right thought as you can see in the photo below

Step 6 Using a stapler. Staple the big flower right thought as you can see in the photo below
 Step 7 Using Stampin Dimensional on the back of the small flower as you can see in the photo below
 you only need one flower from the stamp
 This holds the top in place
Step 8 Using the 3/16" Corner Rounder as you can see in the Photo below
 Step 9 Cut a strip of you D.S.P 30cm long and the width you would like for you paper Ribbon
 as you can see in the photo below
 Tip run your strip along the edge of your table to make it tie and look better
 All finished. Have a go and enjoy this Hostess gift. Happy Stamping Teresa

 Tip run your strip along the edge of your table to make it tie and look better
 All finished. Have a go and enjoy this Hostess gift. Happy Stamping Teresa
Subscribe to:
Posts (Atom)