Thursday, October 28, 2010

Girls Night In

Last night was a wonderful time to spending it with friends to help raise money for cancer.

The photos below show you just how much fun the ladies are having with our mini action thanks to Stampin' Up! for there wonderful donation of retied products. There was a race to see who would get what they wonted but buy the smiles they all got what they bid for and when home very happy.

This was my second night with some great stamper that love cardmaking and scrapbooking to help to raise money for cancer our first one was at Barinsdale and last night was at Warragul.

more reading at the end check out the photos...


Here in Bairnsdale we made and shared some wonderful projects the ladies love to share what they love about card making both day /night fundraiser was a wonderful success.
Keep reading to see who one the raffles but first more photos.


Congratulations to our Raffle winner 1st prize gos to Stacey Fraser
2nd gos to Shirly Mattews
3rd gos to Joan Spencer
Thank you to all the ladies that help I really appreciated it also I would like to thank Jan-Maree Hairdressing forher voucher.
The big news is that we raise all up $1550.00 Thank you to every one that joined me to help raise much needed funds for cancer. Cancer can touches any of us at any time I lost my sister and uncle to cancer and I am a survivor.
Happy Stamping Teresa

Wednesday, October 20, 2010

2011 Classes and Retreats

I would like to take this time to thank everyone for there support your given me and your friendship in workshops, classes,attending workshop and Retreat for the year 2010.

I have another great year of stamping projects to do in card making, scrap booking, and off the page projects. I love to teach the art of stamping to you and your friends so join me in 2011.

WHATS COMING UP IN 2011

Stampin' Up! workshops are an inexpensive and fun way to spend an afternoon or a day with friends to make-and-take some great projects!

As a hostess you can receive FREE exclusive stamp sets and merchandise!

For you FREE Idea Book & Catalogue, contact me today to book your Stampin' Up! workshop!

Sale-A-Bration is coming and if you pre book your Sale-A-Bration Stampin' Up workshop with me between February the 9th & 30 March 2011 you will be placed in the draw for a FREE $50.00 Gift voucher (this is not a stampin up promotion this is my promotion for you)
Please note: (workshop must be held with in this period to go into the draw)

So per book your Sale-A-Bration workshop be for the 30th December 2010 to be entered into the Sale-A-Bration DRAW you could WIN $50.00 WORTH OF STAMPIN' UP! PRODUCTS..
So call me today on 0409533925

Classes and Retreats 2011

Scrapbooking Classes will start back on Wednesday 9th February Time: 7pm-9pm
In this class we will be doing two 6 x6 Layouts and the Tile emboss technique Cost $10.00
Scrapbooking Class Wednesday 9th march Time: 7pm-9pm
In this class we will be doing two 6x6 layouts and the Two step owl punch technique Cost $10.00


Techniques classes will start back on Friday 25th February Time: 10am-12 noon or 7pm-9pm
In this classes we will be doing two techniques to go into your 5x5 art journal if you don't have a journal you may order it on your first night. For the ladies that are booking in from last year please bring your book with you. Cost $10.00
Techniques Class Friday 11th March Time: 10am-12noon or 7pm-9pm cost $10.00

Parchment classes will start back on Friday 25th Feb Time: 1pm-3pm Cost $30.00
Friday 11th March Time: 1pm-3pm Cost $30.00

Retreats at Lakes Friday 4th 5th 6th March This is a great time to get away and do what you love,
and share your time with other stampers. I will be only booking in 25 ladies in this retreat so if there is more than 25 ladies I will run a second retreat for more info call me on 0409533925

Card classes will start back on Wednesday 16th March Time 10-12noon 1pm-3pm or 7pm-9pm
In this classes we will make to cards cost $ 10.00

All classes will be step by step this will helps you learn the art of stamping and have fun.
Please bring the folling items with you to classes and workshops all adhesives, bone folder,and sissors, cutter.
For more information on purchasing Stampin' Up products taking a class hosting a workshop or becoming a demonstrator yourself call me today 0409533925

Check out all Stampin' Up! promotions on http://teresabrown.stampingup.com/
Happy Stamping Teresa

Birthday Wishes

Wow So Sorry this is late...
September's Birthday Wishes go to Samone Giblett happy birthday samone enjoy your gift.
Happy birthday to all

Happy Stamping Teresa

Saturday, October 2, 2010

How do I use a Brayer


Those are the basic uses... but when have you EVER known a mad stamper lol :)to stop at the basics?

If your never brayed before and would like to pick up some good tips and would enjoy learning this great techniques then book into one of my brayer classes or if you have a brayer laying around try some of the tips below.


To Stripe it Up: Use markers to draw stripes or wavy lines directly onto the rubber roller, then roll the brayer across your card stock. Try repeating in the opposite direction to create a plaid design! Try using several colours, draw dots or circles...well, you get the idea.


Wrap it Up: Pop the roller out of the handle & wrap rubber bands around it for added texture. Reassemble, ink up the bumpy brayer & roll onto card stock to make a unique background image. Try other household items - yarn, string, crumpled saran wrap, cheesecloth, plastic netting (save that bag of oranges!) ... the sky's the limit! (This works bestl with the acrylic roller, but you can also use the rubber roller)


Spectrum (Rainbow) ink pads: Ink up the brayer on your Spectrum pad (TIP:keep the coloured sections separated when using a brayer, push them together when using a stamp) - then roll your rainbow-inked brayer over card stock. Use a slight "V" motion when rolling to help the edges of the colours blend together & cover any uninked gaps.


Resist Techniques: There are many variations on the resist technique, but the basic idea is always the same - you apply something to the card stock first, then brayer ink over it. Wherever you have applied your "resist" material, the brayered ink won't stick. Some examples:
Basic Brayer Resist: stamp an image onto card stock with VersaMark. Do not emboss. Ink up your brayer with any Classic ink & roll over the (almost invisible) images - they will magically appear!


Embossed Resist: stamp an image onto glossy card stock with VersaMark or Craft inks (they are wet enough to hold embossing powder) Heat emboss the images with Clear Embossing Powder. Ink up your brayer with Classic ink (you must use Classic ink on glossy card stock for this step) and roll over the embossed images.


Joseph's Coat: Brayer glossy card stock with Spectrum (rainbow) ink - the brighter, the better.

(If you do not have a Spectruum ink just brayer diffrent bright colour over your card stock) When dry, stamp images over top with VersaMark, then heat emboss the images with Clear Embossing Powder. Ink up your brayer with a dark Classic ink (black is best, honest! I like to have a brayer just for black) and roll over the entire card, covering all of the rainbow ink. Wipe excess black off the embossed images & you'll see the rainbow colours showing through!


Also check out Crayon Resist, & Wax Paper Resist - great techniques to try!


Mirror Imaging: Ink your stamp & set it on the table, image side up. Use a clean brayer to roll over the inked image, then roll the brayer again onto card stock - this will give you a reversed image. This is a handy technique to create trees mirrored in the lake below, or to place two characters face to face on your card. Just ink up the stamp, brayer over it to pick up the inked image & brayer onto the card. Next, re-ink the image & stamp it directly onto the card. (If an exact placement is necessary for your design, use the Stamp-a-ma-Jig)Kissing Technique: A variation of Mirror Imaging, the Kissing technique can be done without a brayer, but using one gives a sharper image. Ink up your brayer with ink, then roll it over any textured stamp (many of the background stamps work well). Be sure to get a good covering over the entire stamp (here's where the brayer does a nice job). Next, take an un-inked solid stamp (Monogram letter or solid flower image, for example) and "kiss" it to the inked stamp. The design will transfer from one stamp to the other. Stamp the image onto card stock & voila!

This is a Brayer class I attend with one of my downline. Thanks Breeanna for sharing.
Here are a couple of brayer cards from my last brayer workshop.


Have fun with your brayer
Happy Stamping Teresa x x

Original designer for brayer cards Michelle Zindorf

Wednesday, September 15, 2010

Join My Team


Join the In Crowd and get FREE In Colors!

There's no better time to join as a Stampin'Up! Demonstrator!


Join Stampin'Up! from now until 15th October and get a complete set of In Colors-that's

Classic Stampin' Pads,Stampin' Write Markers, and an assortment of card stock-completely FREE along with your demonstrator Starter Kit has over$415 worth of stamping and business supplies and is always a great deal at only $289. Add the value of the FREE IN COLORS $84.90 and there is no better time to become a Stampin' Up! demonstrator!
Talk to me today to learn more about this exciting offer! Phone 0356236881 or send me an email to tbrown@dcsi.net.au or go to my Stampin' Up! Site
If you are considering the opportunity to love what you do and become a Stampin' Up! demonstrator then I would love to welcome yo into my Team Stamping on the run
We are made up of a variety of demonstrator every thing from hobbyist's to those who are climbing the Stampin' Up Career ladder.
I love what I do and will lead the way but but I am not kind of leader who will try and pressure you to do more than you are happy or comfortable doing-What ever your Stampin' Up! Goals,
whether to found your own Stamping habit or to build yourself a successful stamping business
I would love to help you achieve them.
All you have to do is ask!
Have a great day thanks for stopping buy
Happy Stamping Teresa


Friday, September 3, 2010

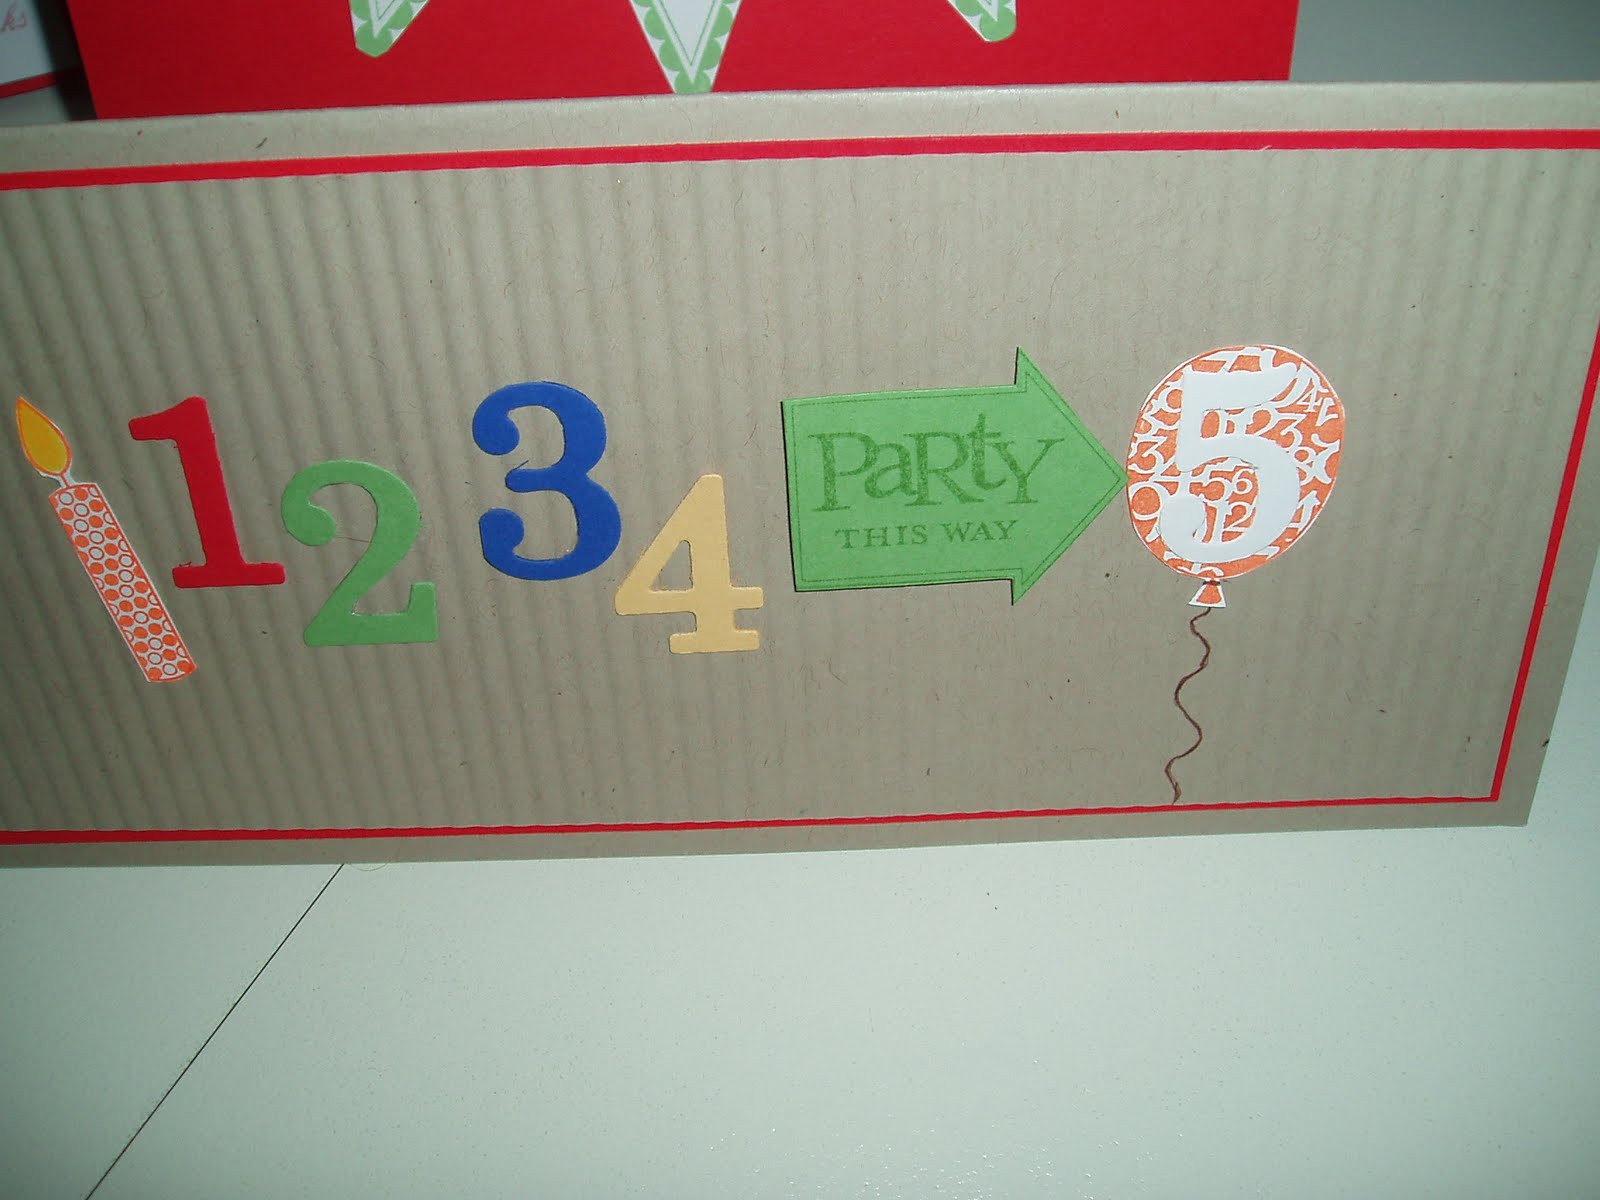
Party this way stamp set

So lets party this week just having so much fun with some new stamp sets some more cards I have put together.This cute card I used the Big Shot Medium Sizzlits Dies so easy to work with and are a great size for card making love them also use the stamp set Party this way Card stock Crumb Cake, Real Red, Wild Wassbi, Pacific Point, So Saffron, whisper white, Ink Tangerine Tango, Wild Wasabi, Marker So Saffron
Birthday only come but once a year but every body loves a hand made card if you would like to hold a workshop with your friends give me a call would love to come and teach you the art of stamping.
If you know some one having a two year old birthday have a go at this little card. I have use the stamp set party this way, Card stock Crumb Cake, Bashful Blue, Wild Wasabi, Real Red Whisper white and the good thing is you can use all the little left over bits of card stock Big Shot Embossing Folder Perfect Polka Dots, Medium Sizzlits Die Timeless Type junior Alphabet, Scallop Circle punch, 1-1/4" circle punch ,snail, bone folder, two way glue pen,
or maybe you would like to try this little card done with the Square punches, stamps and rub ons
Or even this one for that special friend so many different cards with one stamp set have fun and make some cards today.


Printed Petals and Hello Again Stamp sets

Hi to all the wonderful stampers out there. Would like to share with you today some stamp set that are great for that quick and beautiful but not to hard birthday card.
The stamp set I have used on this card is Printed Petals (page 74 )Party This Way (page35) Stamp set Card stock Whisper White Old Olive Melon Mambo So Saffron Inks Bashful Blue,Melon Mambo,punches Rub Ons (Page 134) Snail bone folder and dimensional This is one of the cards we made on the New catalogue launch
This is a great little card to make using the Hello Again Stamp set (Page 68) Card stock More Mustard, Old Olive, Whisper White Inks More Mustard, Old Olive, Real Red, Versa Mark,
Snail, Bone folder, Ribbon Have fun with making your cards if you like to place an order please email tbrown@dcsi.net.au and I will get bake to you have a great day.

Happy Stamping Teresa

Birthday Wishes

Today I would like to welcome my Birthday draw for the month of August
Happy Birthday to all
Today's Birthday Wishes go's to Jenene Evans Happy Birthday Jenene hope you had a wonderful day a gift is coming your way All the best Teresa x x

Sunday, August 29, 2010

Paper Cutter

We all have a Paper Cutter but I still get asked how do I read my Cutter Wow there are so many ladies out there just like me. Its nice to not be the only one and its very refreshing to hear I am not the only one. I receive a lot of phone calls or emails Teresa how do I find 5/8" or 1/8" on my cutter so many of my cards I do in cm but from time to time I do it in inch and I will admit I had this issue for a long time, I hope by putting this on my blog that you will not have this issue with measurements.

So lets start 1"_1/16"_1/8"_3/16"_1 1/4"_5/16"_3/8"_7/16"_ 1/2_9/16"_5/8"_11/16"_ 3/4"_13/16"_7/8"_15/16"_2"
Starting on 1 inch to the 2 inch each little mark is as the chart above and this is the same for 2" to 3" and 3" to 4" and so on.

Your Cutter is really one of the most important Stampin Up tools you will invest in.
SU paper Cutter 106583 $39.95 page 149 2010-2011 idea book & catalogue.
Have fun with you cutter and have fun making this card just by using these measurements
lets have fun


STEP CARD
Using Pretty in pink Card stock cut at 5 1/2" x 8 1/2 " (You can use any color you have at home)

Using Certainly Celery Card Stock cut at 3 1/2" x 3 3/4"

Whisper White Card Stock cut at 3" x 3 1/4"

(panels x 2) for front

Certainly Celery 3/4" x 4"

Pretty in pink Taffeta Ribbon

Stamp set This can be any of your Stamp sets you have at home

to start with pretty in pink card 5 1/2" x 8 1/2" card and place it in the cutter long ways (8 1/2")

Line it up edge at 1" on your cutter.

The arrow on cutter blade.

line up on cutting blade arrow at 1 1/4" on the cutting arm press down and cut from the 1 1/4" to 6 1/4" now the trick is to flip the card over.

Make sure you have FLIP card over for cutting other side.

(DO NOT turn the card to cut other side because you get the wrong cut on the side)


So once your cut your first slit flip card over and line up edge to 1" and cut to 6 1/4"

Next step

Make sure you starting at 1 1/4 end put in cutter score at 1 1/4" (just between the two cuts)

move along to 2 1/4" and score (just between the two cuts) and move along to the 3 1/4" and score (just between the two cuts)

Now move along to 4 1/4" BUT this time you will score the WHOLE card

then score at 6 1/4" (just between the two cuts)

FOLD will be m v m v m (mountain and Vally folds)

Then take your bone folder and go over your score lines
Stamp out image on your whisper white card a good stamp set to use is the Flight of the butterfly

Words If you wont to you can use the corner rounder on all four corners and for more texture you can use a sponge dauber with certainly celery Ink around edges snail all Matt's together
Then at the back towards the bottom add dimensional at the bottom of tag then place this on the second (m)

Tip the best way to line up your insert is to slide in and close card so all line up at the top apply
adhesive to the bottom section only gos on last (m) hope you have fun with this card your welcome to email me your card would love to have a look.

Wednesday, August 18, 2010

2010-2011 idea book & catalogue

Look whats New

Distressing Essential 118762

In the new 2010-2011 idea book & catalogue
Includes tools that make it easier than ever for you to create a distressed, vintage appearance on your projects includes the following tools

  • Sanding block and emery board for distressing Designer Series Paper or smoothing the edges of paper that has been adhered to chipboard

  • Precision files for sanding intricate die cuts and sanding in tight areas

  • Blendable vintage ink and stamp for creating and aged appearance.

  • Tea Stain

  • Charcoal,

  • Mahogany

  • Navy Inks

  • Because vintage Ink contains alcohol they are not recommended for scrapbooking.
  • In your kit you will also receive a plain stamp. Dab ink pad on stamp and rub it over paper, you can also blend the ink with water after applying them to your stamp or project for an aged look. Have fun Talk soon Teresa